Continuous Testing
Continuously deliver flawless customer experiences at speed with scalable web and mobile testing
Scalable Web and Mobile Testing
Digital.ai Continuous Testing is a scalable web and mobile application testing solution that increases test coverage and helps organizations make data-driven decisions. It helps testing teams execute functional, performance, and accessibility scenarios at scale and incorporates simplified AI-Powered test creation that allows any team member to generate automated scripts.

Trusted By Enterprise Customers
Continuously test your web and mobile apps with enterprise-grade security, scalability, and visibility
Release Quality
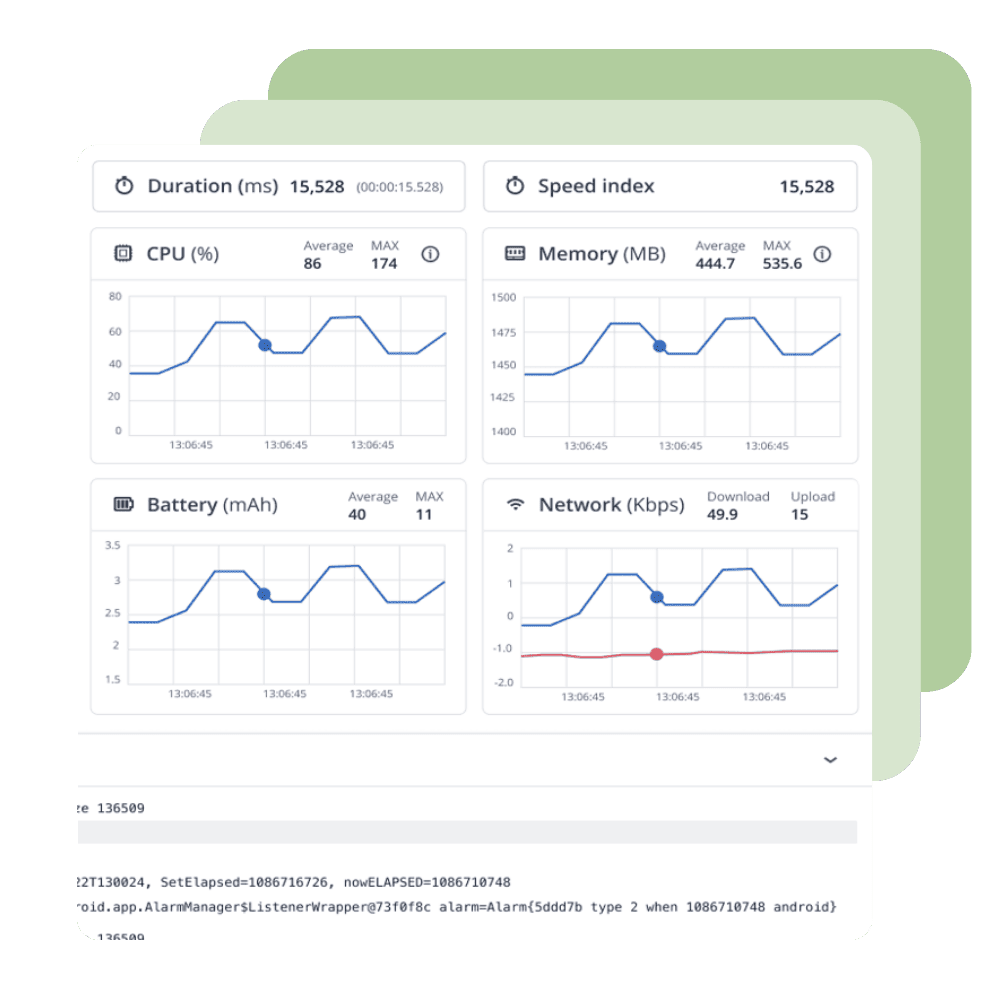
Release High Quality Applications
- Continuously test automated functional and performance scenarios and scale your projects to meet increasing release demands
- Run unlimited parallel tests securely on a large matrix of real devices and browsers located in our globally distributed data centers
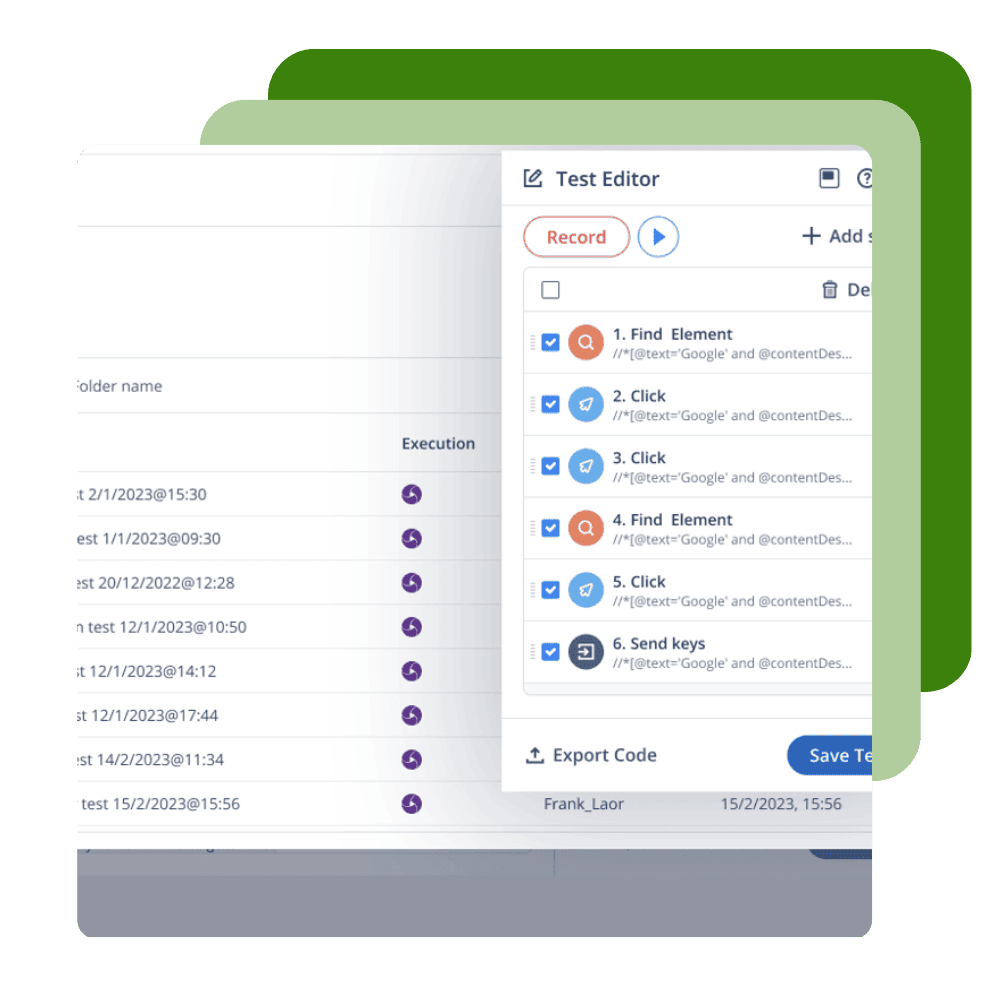
- Build, record and generate test cases faster, and give non-coding team members the ability to create their own automation tests
Scale to Needs
Scale with the needs of your enterprise
- Test using the cloud to share devices and browsers across regions and give your teams secure access from anywhere in the world
- Manage devices and browsers from a centralized hub that cloud managers use to update app and OS versions
- Use an on-premise cloud protected by your security and firewalls or a SaaS cloud with ISO 27001 and Soc-2 protections to secure your testing process
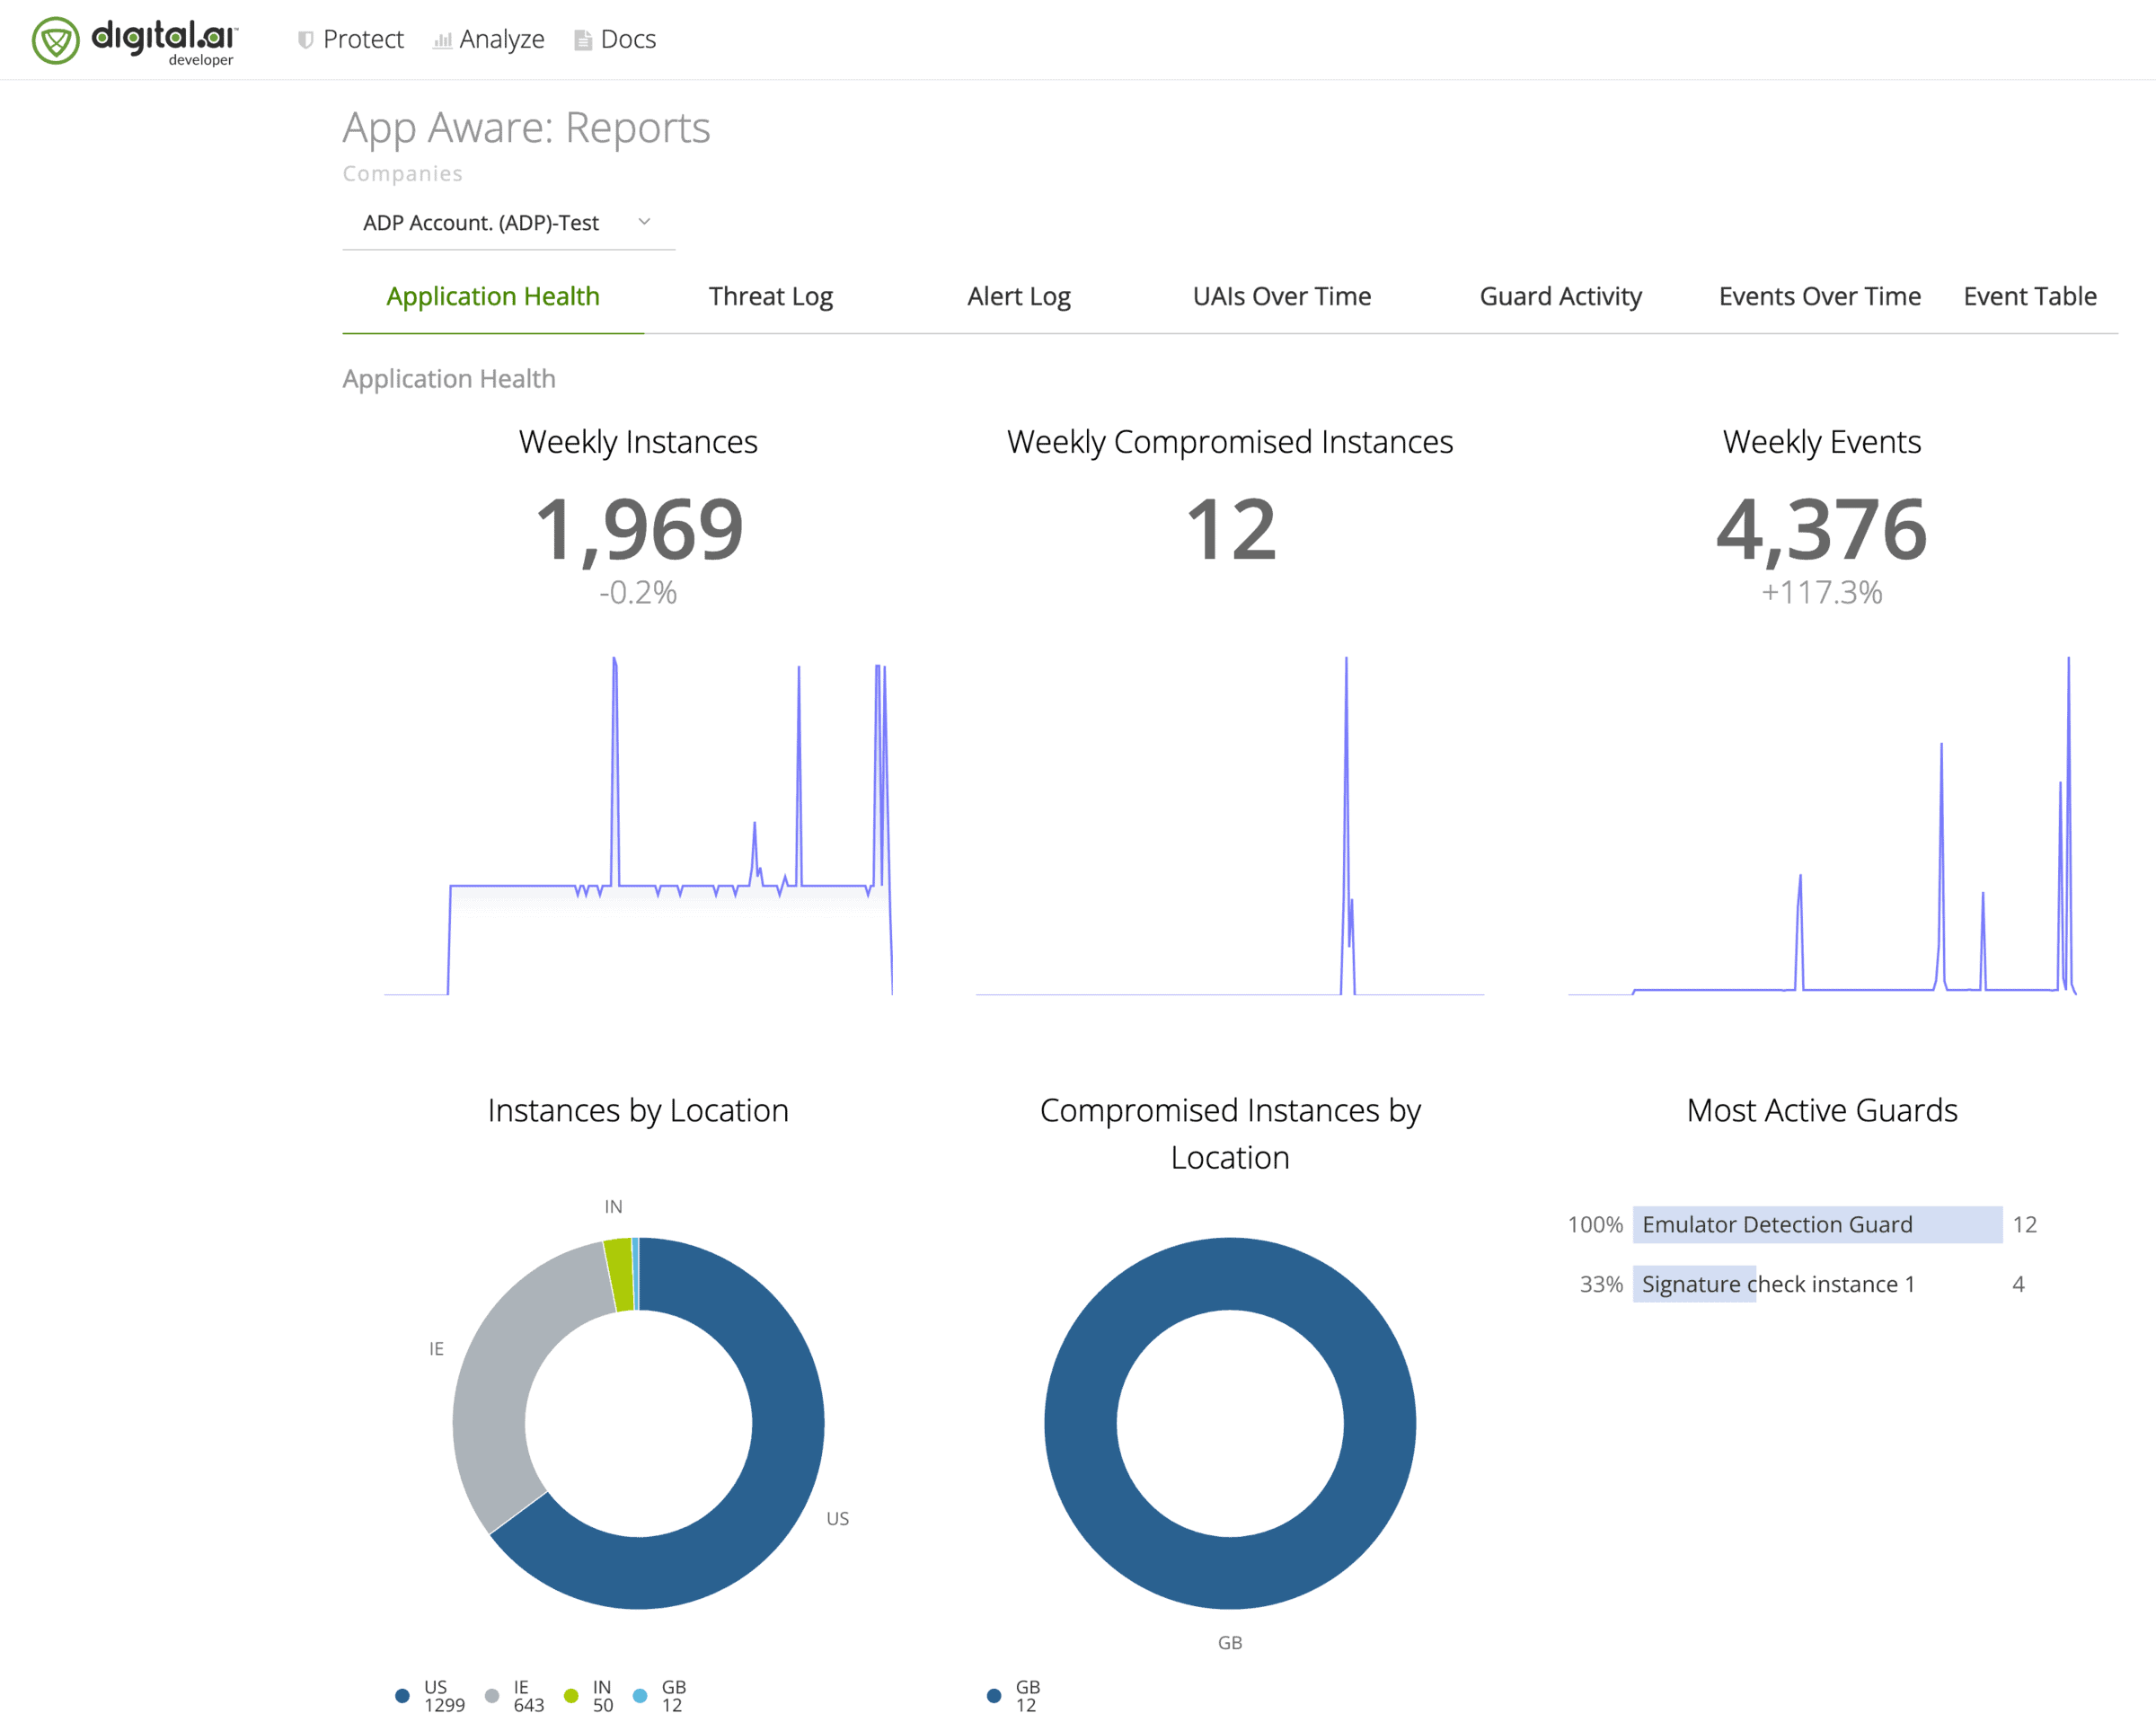
Data-Driven Decisions
Make Data-Driven Decisions
- Access AI-Powered analytic rich dashboards to improve test automation and cloud management
- Monitor and track licenses and device usage to boost productivity and improve cloud management
- Correlate test results and analyze the impact of failed tests to prevent release risk and eliminate fragmentation

Capabilities
Give your DevOps teams easy access to thousands of real devices, virtual devices and browsers wherever they are.

Related Resources

BLOGS
How AI and ML are Revolutionizing Web and Mobile Automated Testing

WEBINARS
Continuous Testing – Swiss Data Center

CASE STUDIES
Groupe BPCE Accelerates Software Quality and Delivery Process with Digital.ai Continuous Testing

WEBINARS
How Test Management Ensures Agile Requirements Meet Testing Results
Related Products

See Digital.ai Continuous Testing in Action
We have helped thousands of teams across industries configure, implement, and optimize Digital.ai Continuous Testing for error-free apps at scale. Contact us to learn more.